

Summarize this blog post with:
 ChatGPT
 Perplexity
 Claude
 Grok
Grok
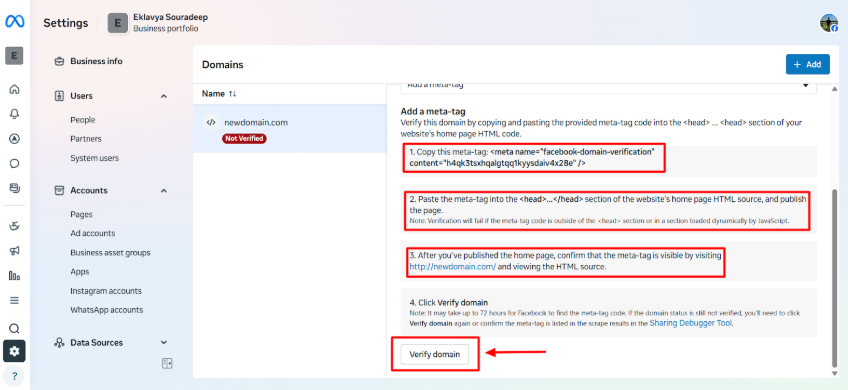
Steps to Verifying A Domain in Meta Business Manager
Here are the key steps of verifying in Meta Business Manager:
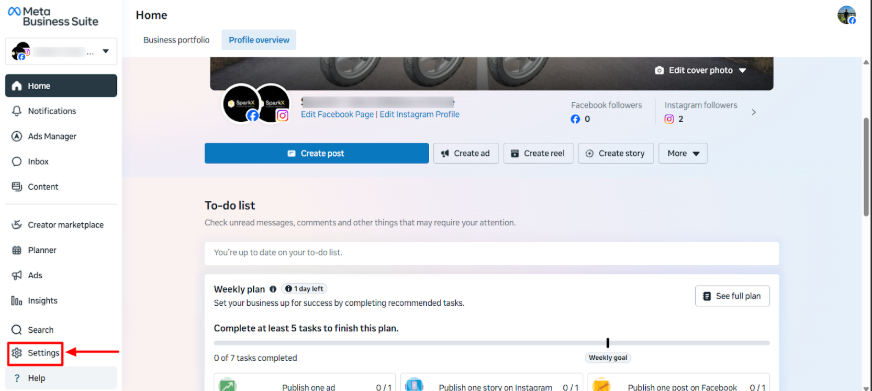
Step 1: Open Meta Business Suite
Go to Meta Business Suite and then click “Settings.”
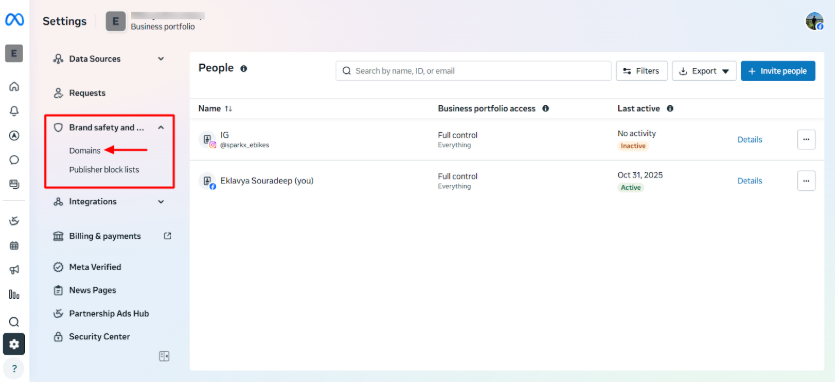
Step 2: Select “Domains”
Under Business Settings, navigate to Brand Safety → Domains.
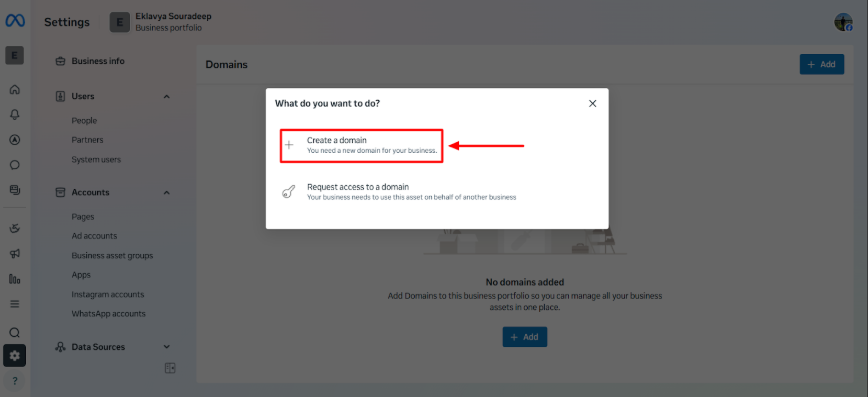
Step 3: Select “Create a Domain”
Once done, choose a domain for your business.
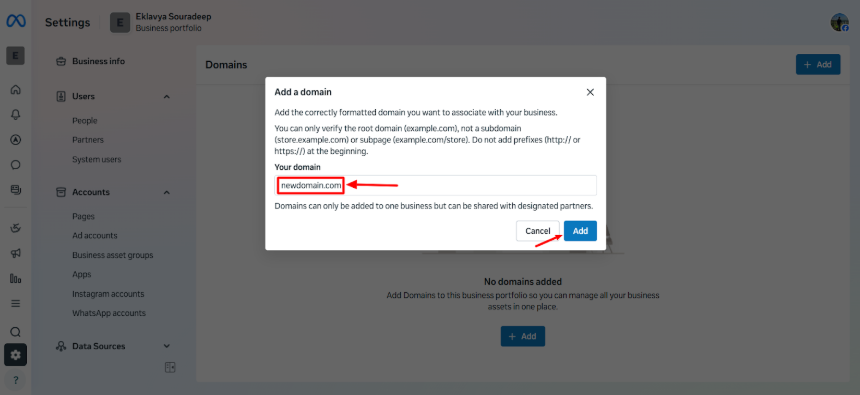
Step 4: Add Your Domain Name
Enter your domain name and then click “Add.”
Step 5: Verify Domain
Add a meta tag and then click “Verify domain” to continue.
Troubleshooting Common Issues
Domain not verified after DNS update:
- Wait for up to 72 hours. DNS propagation might be delayed.
- Check if you’ve added the TXT record to the correct domain (root, not subdomain).
Meta-tag not detected:
- Make sure the tag is placed in the <head> section of your homepage HTML.
- Clear caches or CDN (like Cloudflare) before verifying.
- Ensure your site is publicly accessible.
Subdomain verification failed:
- Always verify the root domain (example.com) rather than blog.example.com.
Conclusion
Establishing your domain in Meta Business Manager is a straightforward but effective way to start creating a safe and professional online presence. The option of DNS verification allows you to take ownership and maintain long-term stability, while meta-tag verification will enable you to verify the website and gain access to marketing tools with little hassle. Either method gives you full ownership of your web properties and access to all of Meta’s ad management tools.
By taking the time to complete this process correctly, you’re ensuring:
- Accurate tracking with Meta Pixel and Conversions API.
- Brand safety and control over your content.
- Seamless management of campaigns across Facebook and Instagram.


- All Posts
- SEO
Table of Contents Book Intro Call Case Studies Share: Related Guides: Related Posts How to Verify Your Domain in Meta...
Table of Contents Book Intro Call Case Studies Share: Related Guides: Related Posts How to Verify Your Domain in Meta...

Table of Contents Book Intro Call Case Studies Share: Related Guides: Related Posts How to Verify Your Domain in Meta...
Table of Contents Book Intro Call Case Studies Share: Related Guides: Related Posts How to Verify Your Domain in Meta...