

Key Steps to Set Up Google Tag Manager on WordPress and Shopify
Configuring GTM on WordPress and Shopify is simple. Here are the key steps:
Step 1: Open Google Tag Manager
Go to https://tagmanager.google.com/ and click “Create Account”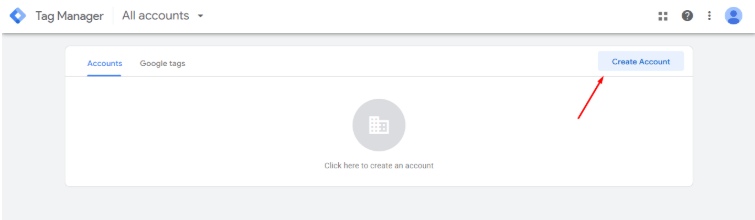
Step 2: Add Your Details
Now, enter your account details.

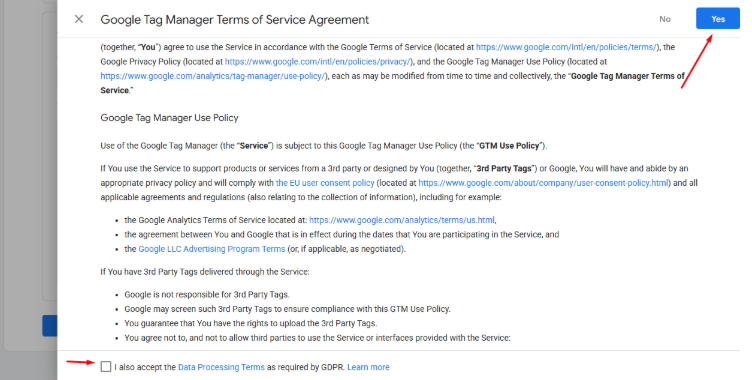
Step 3: Click “Yes”
Accept the terms and conditions and click “Yes.”
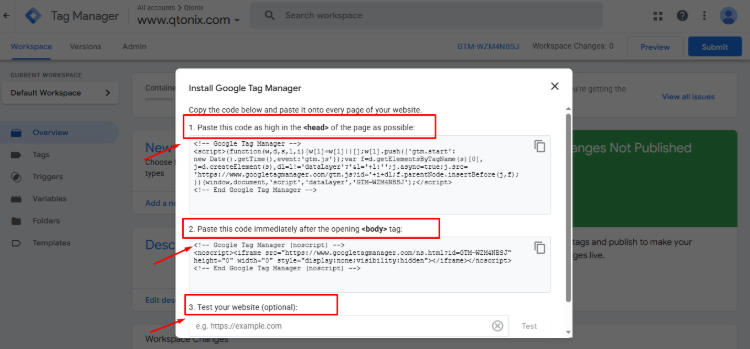
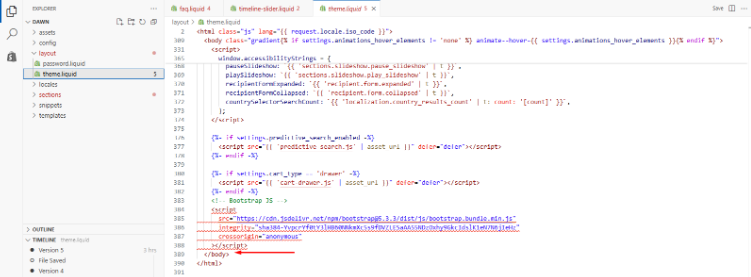
Step 4: Paste The Code
Paste the first code in the head section and the second code in the body of the website, and test whether it is connected or not.
For WordPress
Step 1: Go to WordPress
Use the Header Footer Code Manager Plugin to make things easier.
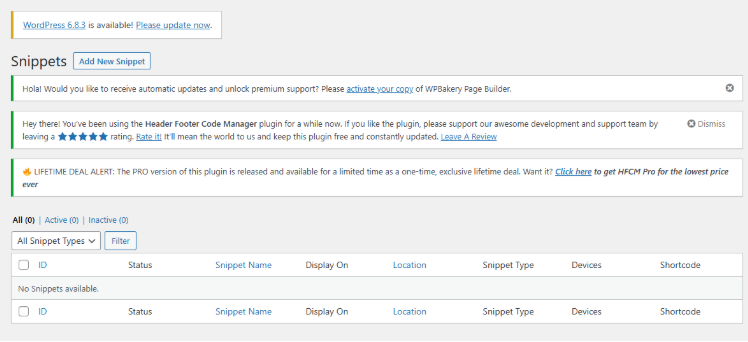
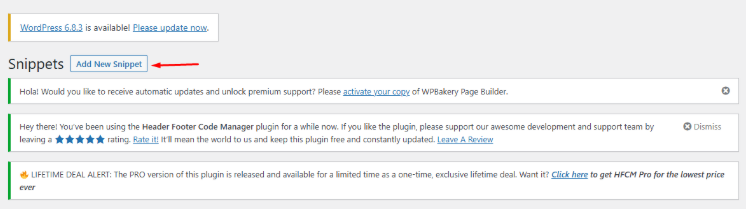
Step 2: Click “Add New Snippet”
Click on Add snippet to add the code in the backend of the website.
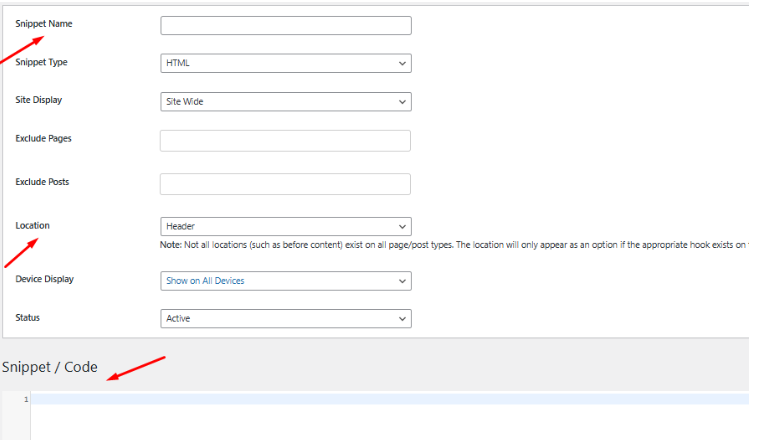
Step 3: Enter The Snippet Info
Add the name of the snippet, keep the location in the header, and the code for the head section below.
Step 4: Paste The Code
Keep the snippet name similar and change the location to the footer, and then paste the footer code in the section below.
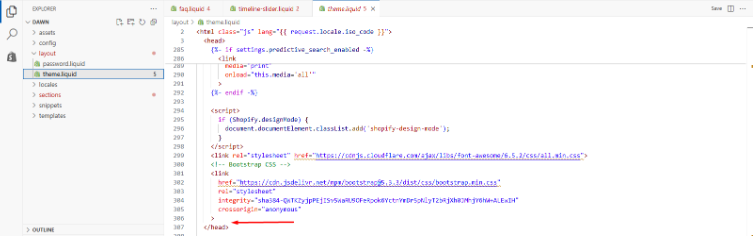
For Shopify
Step 1: Open Your Shopify Account
Log in to your Shopify account and click edit code.
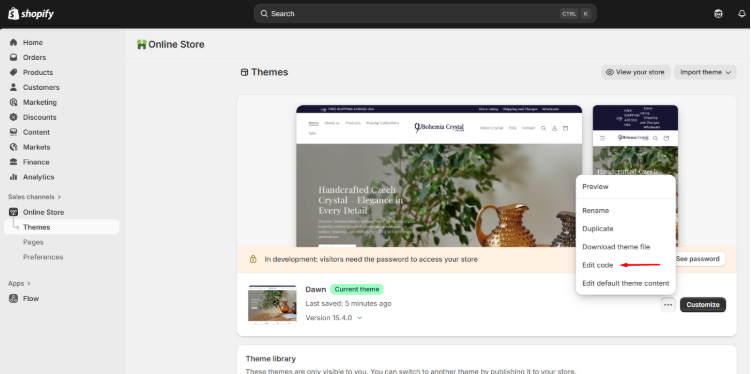
Step 2: Select the theme.liquid
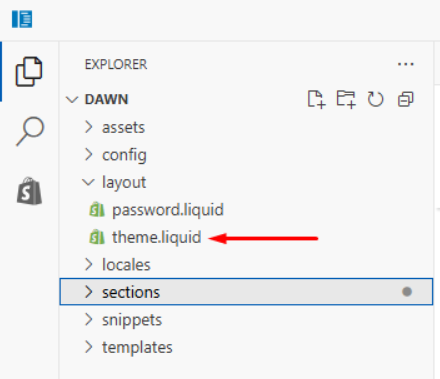
Step 3: Paste The Code
Paste the code for the head section before the head closes.
Conclusion
Installing Google Tag Manager on your WordPress or Shopify site is one of the intelligent decisions you can make for your tech stack. Google Tag Manager provides paid and organic analytics, advertising, and performance tracking capabilities without asking for a developer’s help for even minor changes. Once GTM is live, you can easily add Google Analytics, Ads conversions, and more — all from one clean dashboard.


- All Posts
- SEO
Mastercopy Table of Contents Book Intro Call Case Studies Share: Related Guides: Related Posts SEO Beyond Keywords: Why Schema Markups...
Mastercopy Table of Contents Book Intro Call Case Studies Share: Related Guides: Related Posts SEO Beyond Keywords: Why Schema Markups...

Mastercopy Table of Contents Book Intro Call Case Studies Share: Related Guides: Related Posts SEO Beyond Keywords: Why Schema Markups...
Mastercopy Table of Contents Book Intro Call Case Studies Share: Related Guides: Related Posts SEO Beyond Keywords: Why Schema Markups...