


Key Steps to Add a User in GA4
Now, let’s dive into the exact process of adding a user to your Google Analytics 4 property.
Step 1:
Go to https://analytics.google.com and click “Start Measuring.”

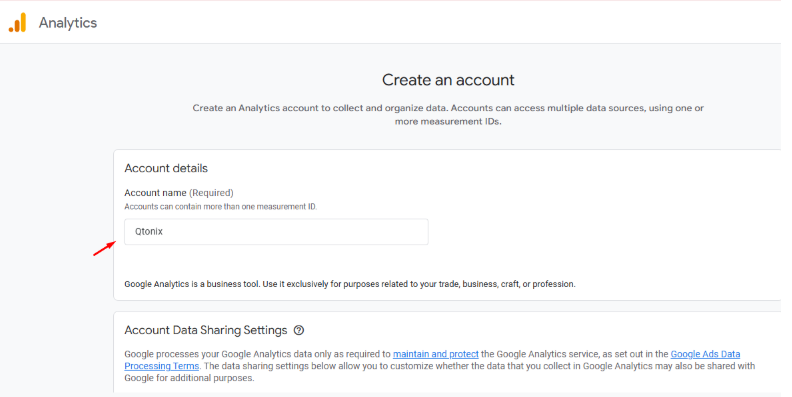
Step 2:
Add your business name in the Account details and click “Next.”
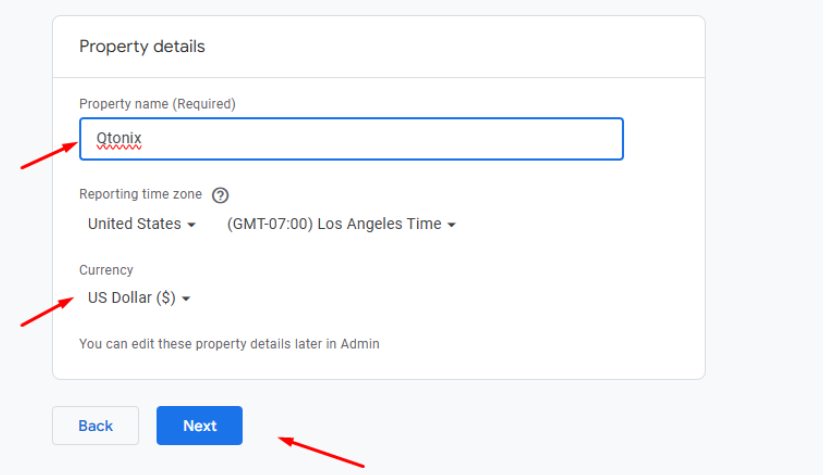
Step 3:
Add a Property name, currency details, and click “Next.”
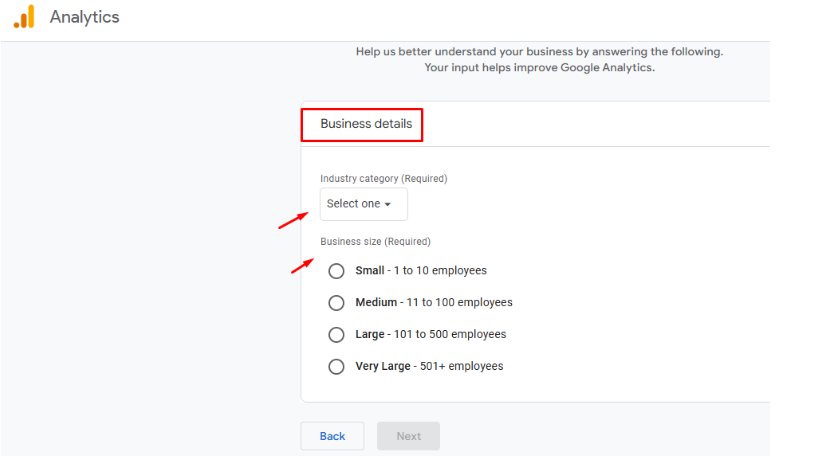
Step 4:
Select your industry category under the business details section
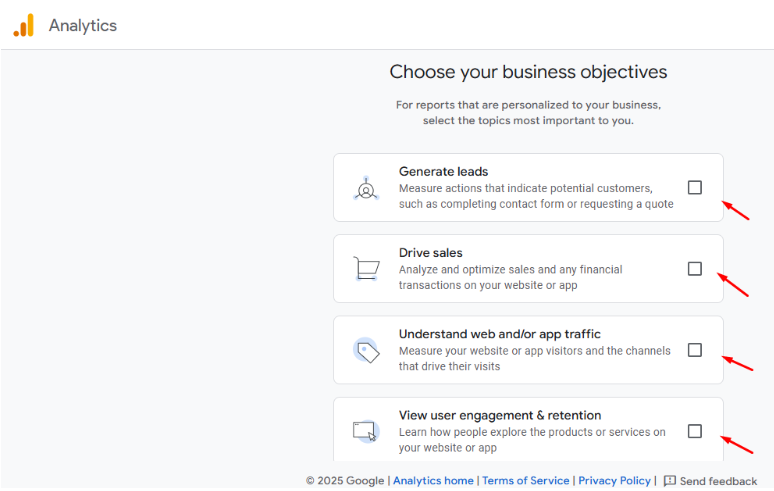
Step 5:
Select the items that you want to track
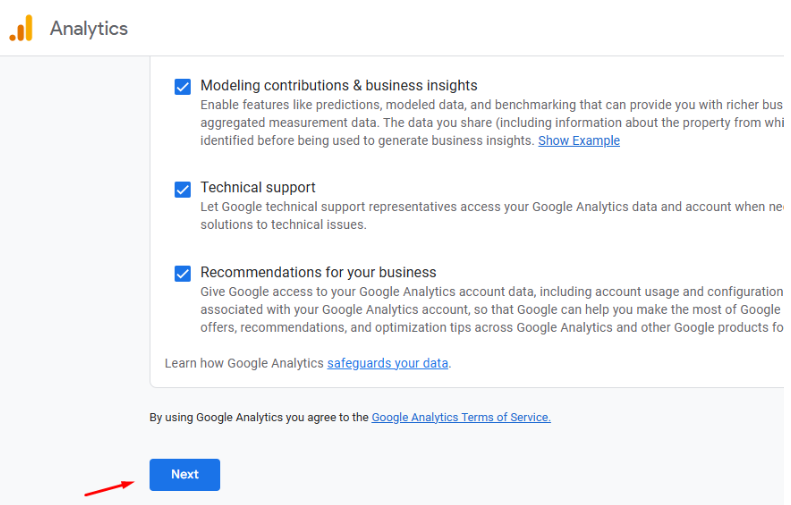
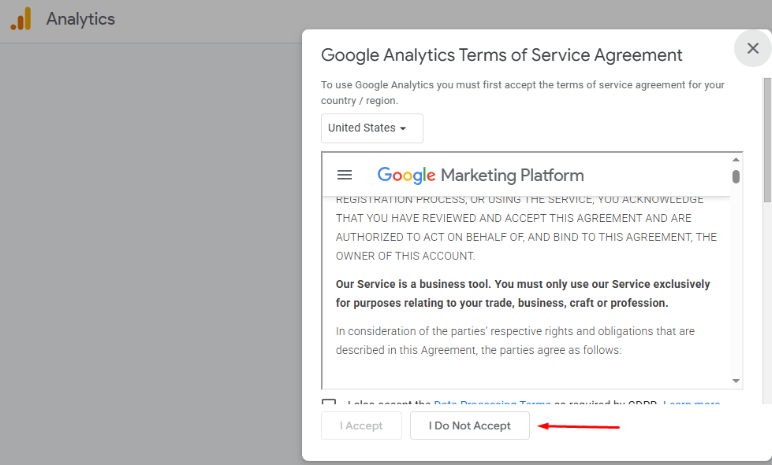
Step 6:
Accept the terms and conditions
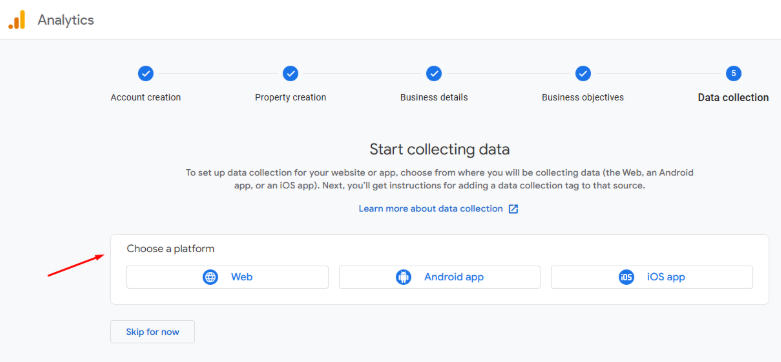
Step 7:
Choose your platform
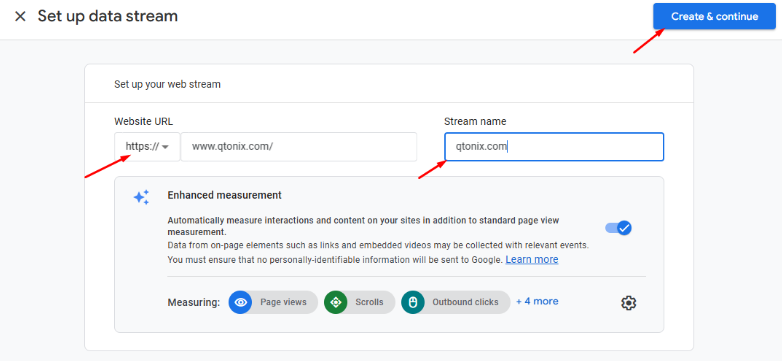
Step 8:
Add your website URL and stream name, and then click “Create & Continue”
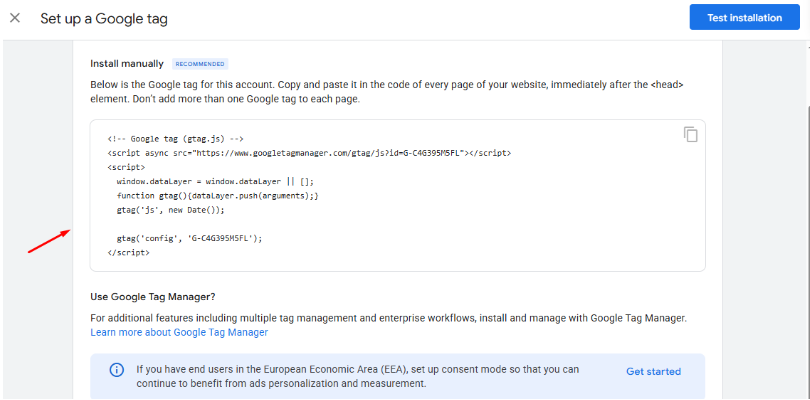
Step 9:
Paste this code in the header section and click “Test Installation”
Step 10:
Click “Next.”
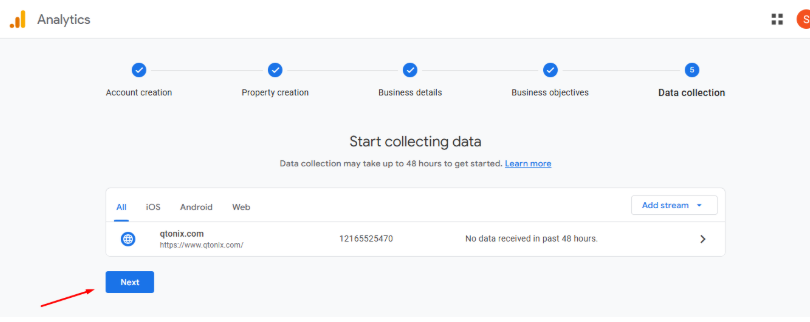
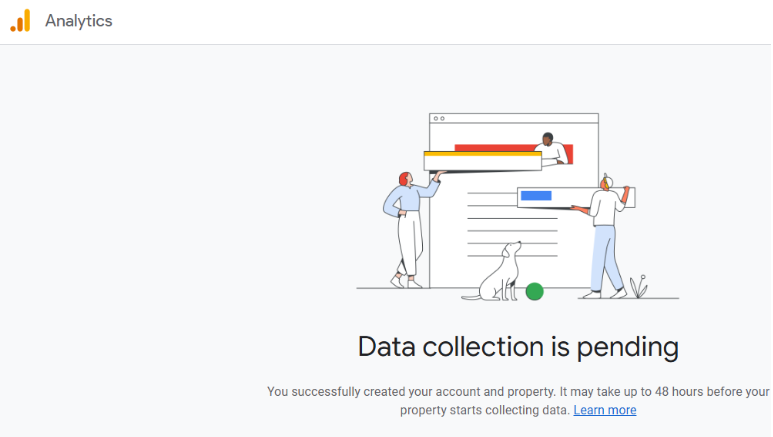
Step 11:
Your data will appear within 48 hrs
Conclusion
Adding users to Google Analytics 4 is a necessary skill for any digital marketer, business owner, or data analyst. By following the two quick and easy steps above: navigating to Property Access Management, typing in the user’s e-mail, and putting them in the appropriate role, you can now work together with your team and partners and securely share data.
As GA4 takes on a larger role in data-driven marketing, knowing how to add and manage users will give your team the ability to get the most out of it without losing security or control.


")

- All Posts
- SEO

Table of Contents Book Intro Call Case Studies Share: Related Guides: Related Posts Step-by-Step Tutorial: How to Share Google Tag...
Table of Contents Book Intro Call Case Studies Share: Related Guides: Related Posts Step-by-Step Tutorial: How to Share Google Tag...

Table of Contents Book Intro Call Case Studies Share: Related Guides: Related Posts Step-by-Step Tutorial: How to Share Google Tag...

Table of Contents Book Intro Call Case Studies Share: Related Guides: Related Posts Step-by-Step Tutorial: How to Share Google Tag...